


About Chocolate; Tempering
A brief guide to Chocolate Tempering
CHOCOLATE TEMPERING IS ...
One of the trickiest tasks required of a chocolatier or indeed of a top pastry chef is the ability to temper chocolate. Tempering is required when melting chocolate in order to dip or to mould and the result must be a hard snap and an iridescent gloss.
Tempering involves taking the chocolate couverture through a number of different melting and setting points to make sure that all the various fat crystals are brought together 'in chorus'.
If this does not happen, then the chocolate will take a long time to set and the finish will be a white bloom and it will not break cleanly but more like fudge. Also the mouthfeel will be different and will, therefore tastes will be obscured.
To temper chocolate:
You need a bare minimum of 500 grams of the finest couverture chocolate - the more the better - and a digital thermometer.
Chop it into very small pieces about the size of half a walnut, or finer if your Knife skills allow. Set aside about 100 grams which you should grate. Place the 400 grams into a metal bowl over a pot of barely simmering water.
Do not allow the bottom of the bowl touch the water. Now slowly let this chocolate melt, giving a helping stir every now and again thoroughly, scraping down the sides and along the bottom and into middle - to distribute the chocolate and to make sure that every tiny particle of the chocolate is amalgamated. But do not whisk or you will incorporate air and that is not helpful.
When the chocolate is completely melted give it one more stir and measure the temperature in the middle of the mass - not at the bottom or at the sides. It should be about 45 - 48C for dark; about 44-46 for milk and for white chocolate. Take care because if you let the temperature rise above 50C there is a chance that you will burn it.
Take the bowl off the heat and add the grated chocolate. Amalgamate thoroughly this help to stabilise the cocoa fat crystals while reducing the temperature to 27/28C. You can stand the bottom of the bowl in cold water to help this process - but beware of introduced any water or steam into this process. Chocolate absolutely hates water!
Now place the bowl of chocolate back over the barely simmering water and, gently stirring all the time, bring the final temperature back to 31C. Et voila. You have tempered chocolate. To make sure that you have tempered your chocolate correctly, dip in a knife, pop it into the fridge for about 3-5 minutes. It should be completely hard and shiny.
Now use your chocolate immediately to dip and enrobe or for your moulding. If may take a while to master this, but it will be worth it. If you don't succeed the first couple of times try again. Like most things in life, practice makes perfect. So long as you have not burnt it nor allowed it to come into contact with water you can always use the chocolate again.
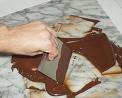 Tempering on Marble Slab...
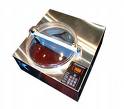
or the easy way, with an Electric Tempering Machine
The Cheese and Wine Shop Truffles; Makes 35-40 Truffles
Ingredients
200 g Best milk chocolate of Choice - evenly chopped into 4 mm pieces - coffee bean size. Suggest; Cafe Tasse, Lindt
175 ml double or whipping cream
1 level tsp Maldon Sea Salt
225 g cocoa powder or icing sugar for rolling or 1 kg 70% couverture for dipping (see separate instructions)
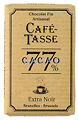 Quality Chocolate; essential for quality Truffles
Method
Cover a chopping board or baking tray with cling film. This is to space out the truffles as you make them.
1. Place the chocolate in a large mixing bowl. Sprinkle of the Maldon Sea Salt.
2. In a saucepan, bring the cream to a bubbling boil. Let it subside for a minute or two and then pour over the finely chopped chocolate.
3. Blend thoroughly until all the chocolate is completely melted. This is called a 'ganache' which is an old French word for a mixture of chocolate and cream.
4. Leave to cool at room temperature which will take at least half an hour for method A or place in fridge for one hour for method B.
Method A
5. With an electric hand whisk (or a balloon whisk if you have the energy!) gently whisk the mixture merely to emulsify and add a little lightness - to the point where it just begins to hold. The whisk should barely leave its trail. No more or it might separate and become difficult to manage. Don't worry if you think it is still a little soft - it soon firms up.
6. Spoon the ganache into a 35 cm (14 in) piping bag with a 1 cm (½ in) nozzle and pipe small 3.5 cm (1 ½ in) truffle balls onto the film covered baking sheet.
7. Refrigerate for about one hour - then, with palms of hands coasted in icing sugar, you can roll into little moth size balls.
8. Roll them in the cocoa power. Keep in an airtight box in the fridge until you want to serve them.
Method B
9. When the mixture has set in the fridge, remove the bowl and let it come to just under room temperature and, using a teaspoon or a melon baller, 'dig' out mouth size spoonsful.
10. Dust the palms of your hands with icing sugar and roll these into little balls.
11. As 8 above roll them in cocoa powder and keep in airtight box in the fridge until you eat to eat them.
Alternatively you can dip them in tempered couverture as explained on tempering instructions Best to use a proper dipping fork but a normal eating fork will do the trick. Drop the non cocoa covered truffles into the bowl of tempered chocolate and 'fish' out with the fork. Tap the bottom of the truffle on the side of the bowl as you draw it out and place on to the cling filmed surface. This will ensure that when it is set it peels off intact.
Note: You can of course use Milk or White Chocolate but you need to reduce the amount of cream by about 50ml which will be compensated by the milk in the two chocolates.


